 Save
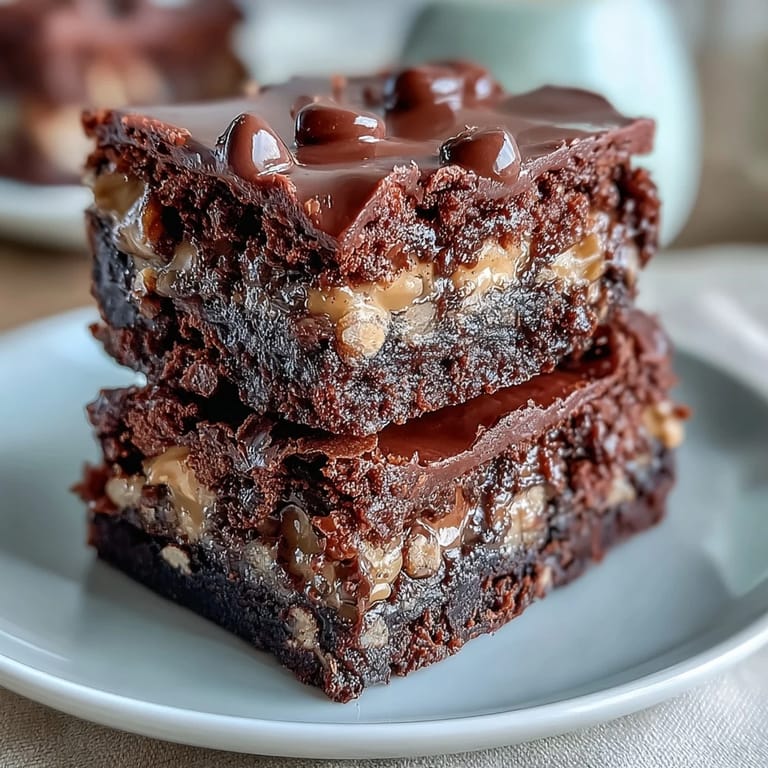
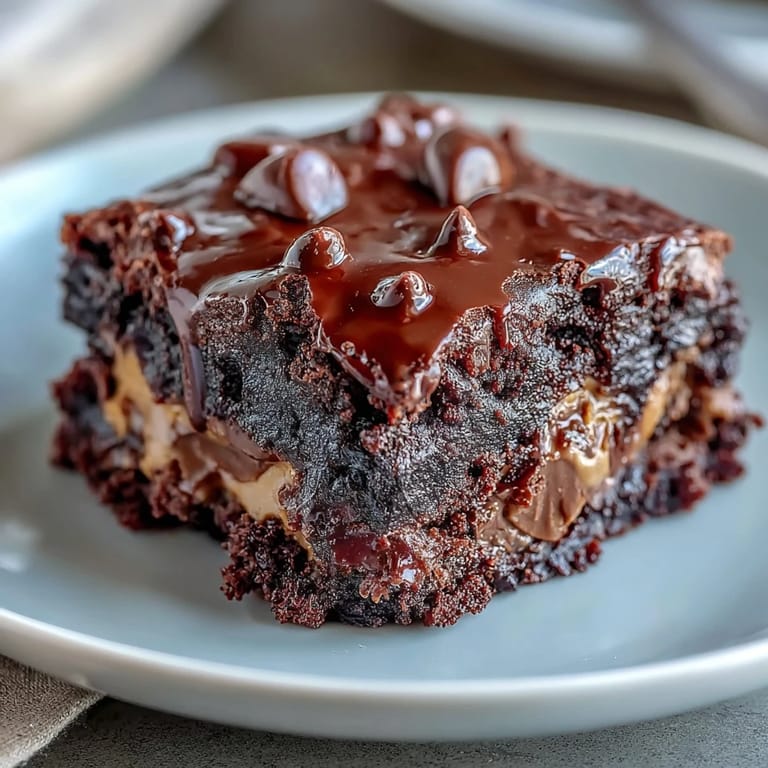
Save The first time I made this, I was running thirty minutes late for a potluck and threw everything together in a panic. My friend Sarah actually gasped when she took her first bite, then proceeded to text me about it for three days straight. There is something almost magnetic about the combination of warm chocolate cake and melted peanut butter that makes people forget their manners entirely.
Last winter, my neighbor texted me at 9 PM asking what smelled like heaven. I had to bring her over a slice still warm from the oven. She sat on my couch in her pajamas, eating it straight from the plate with a fork, and told me this was the kind of dessert that fixes bad days.
Ingredients
- Devils food cake mix: This creates the deepest chocolate foundation possible without measuring a dozen dry ingredients
- Creamy peanut butter: Room temperature spreads easily and creates that irresistible layer at the bottom
- Unsalted butter: Melted butter helps the cake mix transform into batter without a mixer
- Whole milk: The richness here really matters for keeping the cake tender
- Mini peanut butter cups: Chopped full sized ones work too but minis distribute more evenly
- Semi sweet chocolate chips: These balance the sweetness from the peanut butter cups beautifully
Tired of Takeout? 🥡
Get 10 meals you can make faster than delivery arrives. Seriously.
One email. No spam. Unsubscribe anytime.
Instructions
- Get your oven ready:
- Preheat to 350°F and grease a 9x13 inch baking dish thoroughly
- Create the peanut butter layer:
- Spread the creamy peanut butter in an even layer across the bottom of your prepared dish
- Make the batter:
- Whisk together the cake mix, melted butter, and milk until mostly smooth
- Layer it up:
- Pour the chocolate batter over the peanut butter layer
- Add the goodies:
- Scatter mini peanut butter cups and chocolate chips across the top
- Bake until perfect:
- Bake 35 to 40 minutes until set and a toothpick comes out with moist crumbs
- The waiting game:
- Cool 15 minutes before serving warm or completely for cleaner slices
 Save
Save My teenage son walked in while this was baking and actually asked if we were having company. When I told him it was just for us, he hovered by the oven until the timer went off. Now he requests this for every single family gathering, birthday, or random Tuesday.
Make Ahead Magic
You can assemble everything up to eight hours before baking and keep it covered in the refrigerator. Add five minutes to the baking time if going straight from the fridge. The peanut butter layer firms up slightly when cold but melts perfectly in the oven.
Serving Ideas
Warm servings are incredible with vanilla ice cream melting into all those crevices. A drizzle of salted caramel takes it over the top if you really want to impress people. For a dinner party, I like to serve individual squares with a dollop of whipped cream and a tiny peanut butter cup on top.
Storage Solutions
This keeps surprisingly well at room temperature for two days covered in foil. The refrigerator extends it to five days but you will want to warm individual slices for twenty seconds in the microwave. The peanut butter layer firms up when cold.
- Freeze whole slices wrapped tightly in plastic for up to three months
- Thaw overnight in the refrigerator before serving
- Reheat gently to bring back that fresh baked texture
 Save
Save Some desserts are about technique and precision. This one is about pure unapologetic comfort food happiness that happens to be ridiculously easy.
Your Questions Answered
- → Can I use natural peanut butter instead of creamy?
Natural peanut butter can work, but creamy processed peanut butter creates a smoother, more cohesive layer. Natural varieties may separate slightly during baking, though the final taste remains delicious.
- → Should I serve this warm or at room temperature?
Warm is ideal—the peanut butter cups are perfectly gooey and the texture is incredibly indulgent. Let it cool for at least 15 minutes after baking, but serving within an hour yields the best experience. Room temperature works too, with cleaner slices.
- → Can I make this in advance?
Yes! Bake up to a day ahead and store covered at room temperature. Reheat individual portions in the microwave for 20-30 seconds to recreate that freshly baked warmth and gooey texture.
- → What size baking dish works best?
A 9x13-inch dish is perfect—the depth allows proper layering while ensuring even baking. Smaller dishes may overflow, and larger ones could produce a thinner, less indulgent result.
- → Can I freeze leftovers?
Absolutely. Wrap individual portions tightly or freeze the entire dish (well-wrapped). Thaw overnight at room temperature and reheat gently. The texture remains remarkably good after freezing.
- → Why is it called a dump cake?
The name comes from the straightforward preparation method—ingredients are layered or dumped into the dish with minimal mixing. No elaborate creaming or folding required, making it incredibly beginner-friendly.