 Save
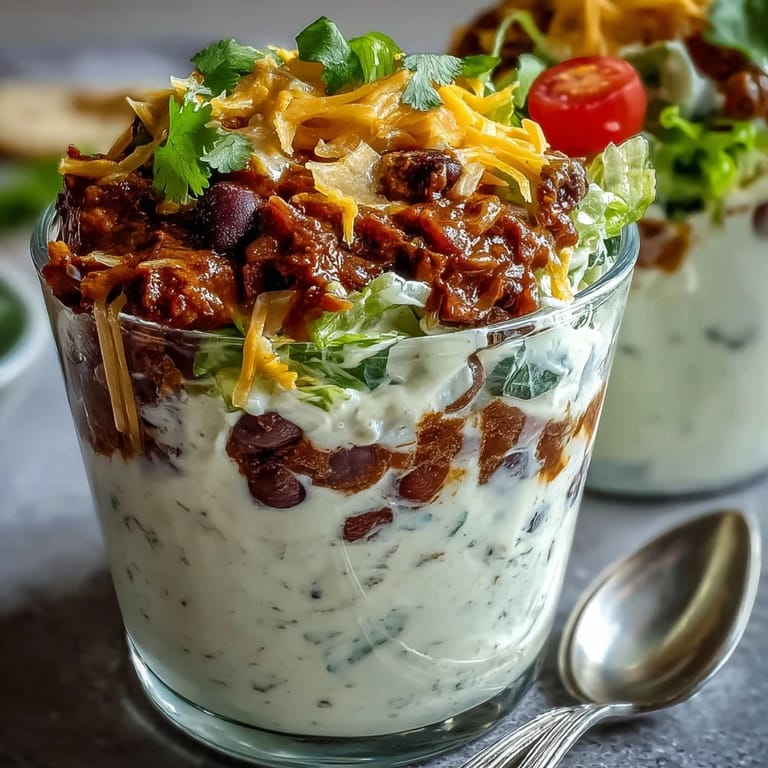
Save My sister pulled me into the kitchen the night before her Cinco de Mayo party with that look—the one that means she's already promised something she hasn't made yet. She wanted individual taco dips in clear cups, something that looked fancy but wouldn't stress her out. We threw this together in her kitchen while her kids played outside, and honestly, it became the first thing to disappear that night. Now whenever someone asks what to bring to a gathering, these cups are my go-to because they're foolproof and somehow make you look like you spent way more time than you actually did.
I made these for a potluck at work once, and watching grown adults fight over the last cup was hilarious. One coworker asked for the recipe immediately, then admitted she didn't know how to cook. That's when I realized how powerful this dish is—it feels gourmet but it's genuinely just layering things. Now I make double batches because I always underestimate how many people will eat them.
Ingredients
- Refried beans (1 can, 16 oz): This is your foundation, and honestly, a good can of beans is just as valid as homemade—don't stress about that part.
- Sour cream (1 cup) and cream cheese (4 oz): Together they create this dreamy, spreadable layer that holds everything together; I learned the hard way that softening the cream cheese first makes mixing effortless.
- Taco seasoning (1 packet): The shortcut that makes sense here since it distributes the flavor evenly through the creamy layer.
- Shredded lettuce (1 cup): Use the crisp kind, not the limp stuff at the bottom of the bag—this is where texture matters most.
- Cherry tomatoes (1 cup, diced): They stay fresher longer than regular tomato slices and add bursts of sweetness that balance the savory elements.
- Black olives (1/2 cup, sliced): Those little briny pops make each bite interesting and prevent the layers from feeling monotonous.
- Shredded cheddar cheese (1 cup): The sharp kind is worth hunting for because it actually tastes like cheese, not just salt.
- Green onions (1/4 cup, chopped): They're the final flourish that makes everything look intentional and taste bright.
- Salsa (1/4 cup, optional): This is where you customize—mild, spicy, pico de gallo, whatever matches your crowd.
- Tortilla chips: Buy good ones because they're doing the heavy lifting in terms of taste.
Tired of Takeout? 🥡
Get 10 meals you can make faster than delivery arrives. Seriously.
One email. No spam. Unsubscribe anytime.
Instructions
- Mix the creamy magic:
- Combine your sour cream, softened cream cheese, and taco seasoning in a bowl until it looks smooth and uniform. This should feel effortless—if it's lumpy, your cream cheese wasn't soft enough, so just give it a minute longer next time.
- Choose your cups:
- Small clear cups (8 oz works perfectly) are essential because half the appeal is seeing those gorgeous layers. You can find them at party supply stores or even use mason jars if you're feeling creative.
- Lay down the bean foundation:
- Spread about 2 tablespoons of refried beans into the bottom of each cup, pressing gently so they stay put. Make sure they cover the bottom evenly so nothing falls through when you add the next layer.
- Spread the creamy layer:
- Add roughly 2 tablespoons of your cream cheese mixture on top and smooth it out gently with the back of a spoon. Don't rush this—it's the glue holding everything together.
- Add the green crunch:
- Layer on your shredded lettuce next, pressing it down just slightly so it doesn't shift when you add heavier toppings. This is where the texture contrast starts to feel real.
- Build with fresh flavors:
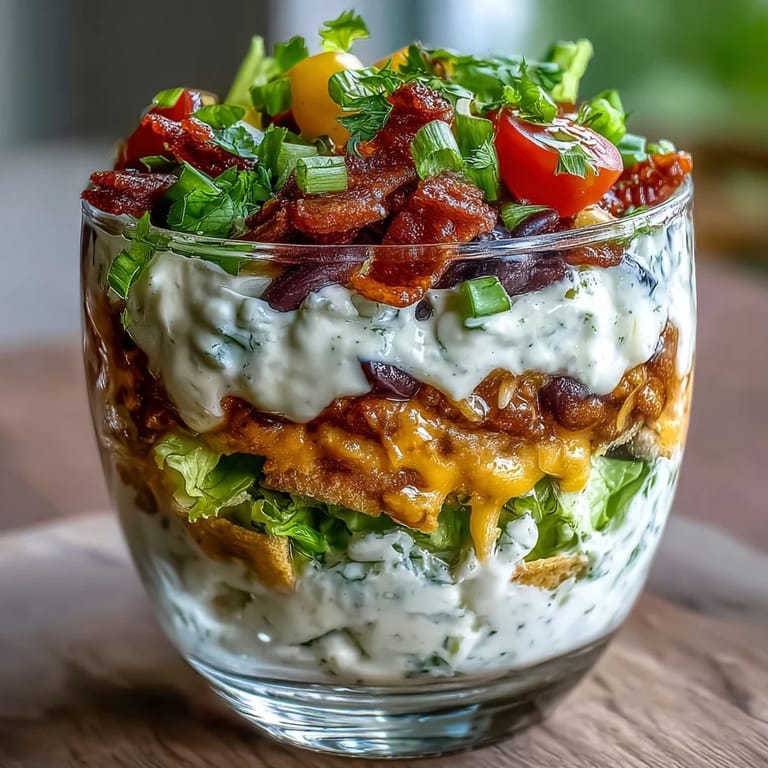
- Distribute diced tomatoes and sliced olives across the lettuce layer, getting a little of each into every cup. The visual variety here is honestly half the fun.
- Crown with cheese and alliums:
- Top everything with shredded cheddar and a sprinkle of green onions, making it look as colorful as possible. A small spoonful of salsa on top adds both flavor and that final pop of color.
- Serve with style:
- Set these out with a stack of good tortilla chips and watch them disappear immediately. If you assembled them ahead, pull them from the fridge just before the party starts.
 Save
Save My neighbor once brought these to our block party, and it became this whole thing where everyone was trying to guess what was in them. Someone swore there was jalapeños (there weren't), and someone else thought the cream cheese layer was some fancy Mexican cheese. The simplicity of it—just good ingredients layered thoughtfully—somehow tricked everyone into thinking she'd spent hours on it. That's the real magic here.
Make-Ahead Genius
You can absolutely assemble the beans and cream cheese layers up to 4 hours before your event, then refrigerate them. This means on party day you're only adding the fresh stuff at the last minute, which is when you actually want to be mingling instead of chopping vegetables. I learned this the hard way at my first party when I tried to do everything morning-of and ended up stressed about timing. Now I prep the base layers the night before, and it genuinely changes everything.
Flavor Customization
The beautiful part about this recipe is that it's basically a template—you can make it fit whatever your crowd loves. Some people add jalapeños for heat, others use Greek yogurt instead of sour cream for a lighter version, and I've seen folks add crumbled cooked ground beef or chorizo if they want protein. The taco seasoning keeps it cohesive no matter what you swap around, so you really can't mess this up.
Serving Suggestions & Storage
These taste best served at room temperature or straight from the fridge—there's no heating involved, which is honestly perfect for appetizers because your oven is free for other things. They're best eaten within a few hours of assembly, mainly because the lettuce starts to wilt, but the base layers will last in the fridge for a couple of days if you need them to. One thing I always do is set out extra tortilla chips because people inevitably use them as scoops and go through them faster than you'd expect.
- Serve them at room temperature or chilled—both work beautifully depending on your preference.
- Pair them with extra salsa, hot sauce, or guacamole on the side for guests who want to customize.
- Count on about 1.5 to 2 cups per person if these are your main appetizer, or roughly half that amount if you're serving multiple options.
 Save
Save These cups have become my secret weapon for any gathering because they're genuinely foolproof, they look impressive, and people always come back for more. Make them once and you'll understand why they're worth keeping in your regular rotation.
Your Questions Answered
- → Can I prepare these cups ahead of time?
Yes, you can assemble the base layers up to 4 hours in advance and refrigerate. Add fresh lettuce, tomatoes, and other toppings just before serving to maintain freshness.
- → What can I use to add heat to the dip cups?
For a spicy kick, include sliced jalapeños or substitute regular taco seasoning with a spicy version to enhance the flavor.
- → Are there vegetarian-friendly options for the creamy layer?
Yes, substituting Greek yogurt for sour cream and cream cheese creates a lighter vegetarian-friendly creamy layer.
- → What accompaniments pair well with these cups?
Tortilla chips are ideal for scooping and serve as the perfect crunchy accompaniment to the creamy and fresh layers.
- → How should I store leftovers?
Store any leftovers covered in the refrigerator and consume within 1-2 days. Add fresh toppings again before serving.